You will need to do the following one time setting before you start making the NC codes file.
Select the menu NC Links->NC Options...
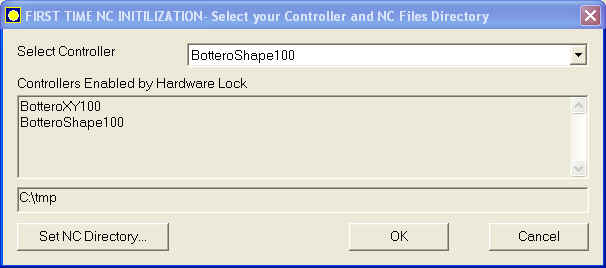
You will see the following NC Controller Settings dialog...
Select your controller from the drop down list. The list of controllers enabled in the Hardware lock are shown
Set the directory into which the NC files have to be saved.
Note:
1. By default the controller enabled by Hardware Lock is selected and the NC directory is set to "C:" If the List shows NONE then NO controllers have been enabled in your lock and generation of NC codes is disabled.
2. For Bottero Shape you will require one more directory called DAT.
For e.g.: If your selected NC Directory is C:\tmp. Then in C: you will have to create a directory named DAT.
To make the Bottero NC file follow the steps shown below.
Optimize the job.
On the Details page, click on the controller CNC button or goto OUTPUT tab, and click on the controller CNC button. Or you can also make the NC codes file from menu NC Links->Bottero Opt.
PLUS 2D will write out the .OPT files into the directory set during NC Options.
Copy the .OPT file into the floppy disk and the .DAT (in case the Job contains shapes) from the DAT directory.
Insert the floppy in the Bottero Machine computer with BCMS running on it.
Now Copy (Ctrl - F2) the floppy disk contents into the machine.
In this window, select Source as Floppy Disk and Destination as Hard Disk.
Select the Modes as Overwrite Conformation.
In File Types select second option, i.e., Optimizations and click Copy button at the bottom.
This will copy all the required files from Floppy disk into the appropriate directories in BCMS.
Now to view this Optimization file click F4 and select the file that you have saved from the shown list of files. Once it has loaded the file, you are ready to cut the patterns. For detail informaion Click Here!